Backyard Transformation Update: From an Untouched Sloped Backyard to a Mediterranean Inspired Patio
- Burcu

- May 23, 2024
- 3 min read
Updated: Sep 9, 2025

Hello, hello again!
It's me, and this week we're diving into phase three of our home renovation: Backyard Design. Project Green Ridge: Phase 3 - BACKYARD
This project involves creating a backyard oasis from start to finish, transforming a once-sloped and unused space into a Mediterranean-inspired retreat.
Let's get to it.
Backyard Transformation: From Sloped Garden to Level Paradise
Inspiration and Planning
We started with a beige exterior paint and a sloped garden leading down to a pond (or small lake).
Coming from Antalya, Turkey; I was always surrounded by sea, sun, and sand. I spent all my summers by the sea, at the coast of the Mediterranean.
The tan colors, soft textures, and terra-cottas or sandy materials, all those, they bring back the memories; gives a calm, inviting, and slow-living vibe. I wanted to have that feel in our backyard. For Alper and I, Sea & Summer were part of our lives from the very early days.
Inspired by Mediterranean aesthetics, we envisioned a serene, nature-blending design. Drinking lemonade and watching the sun going down... Yep, that is the vision. Peek into my inspiration board on Pinterest: HERE
Backyard Transformation First Step: How to Build a Retainer Wall?
How do you create a level patio on a sloped space?
The existing concrete patio, accessible from the basement, provided a blank canvas. The first step was constructing a retaining wall and extending the unfinished backyard patio, creating a seamless blend with nature, akin to an infinity pool.

Our landscape architect, Molly from W Design Landscape, designed an organic curved line to mimic our trees, preserving as many as possible.
Only one tree, which was sick and rotting, had to be removed. This natural approach dictated our hardscape decisions and allowed the space to blend seamlessly with the surrounding environment.
Filling and Flattening the Slope
We filled the slope, creating a flat first level and extending the patio towards the pond. To provide a boundary for kids, we planted "duke garden" plants, which added soft, natural fencing.
Future Plans: Fire Pit and Lake View
The ultimate plan involves two levels, including a fire pit seating area by the lake, extending from the patio. Our landscape architect is finalizing the necessary approvals and designs for the lake-side retaining wall.
We hope to complete this by the end of summer, granting us a direct lake view. Ok, let's focus back on the project at hand...

Designing the Patio: How Did We Select the Stones and Decide on a Layout?
Finding the Perfect Stones
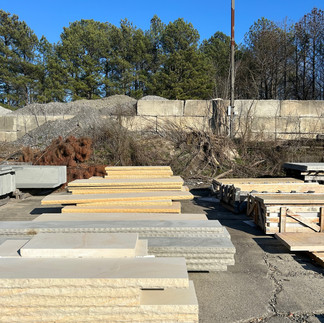
Finding the ideal light tan flagstones was challenging, so we mixed two types: limestone and ashlar stone. One type, typically used for countertops, required special cutting, which I helped shape with chalk. It was a fun and interesting process. Lots of noise was created! Glad it lasted only 1-2 days.
Organic Layout and Special Touches
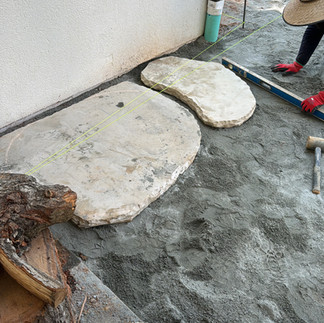
We created an organic layout by mixing large, medium, and small flagstones, ensuring a natural flow. As a delightful surprise, we included a heart-shaped stone for our kids, a lasting symbol of love in our design.
Filling the Gaps
For the spaces between the stones, we opted for NOCO Polymeric Sand in Desert Tan. This choice provided a durable, weed-resistant, and insect-repellent solution that matched our desired aesthetic.
Repainting the Concrete for a Cohesive Feel

Choosing the Right Finish
The final step was repainting the concrete to achieve a cohesive look.
The old concrete had worn out over the years, so we chose Behr Premium Advance DeckOver in Sage.
This color complemented our soft tan palette and provided a fresh, clean finish.
Application and Result
The repainting process took about 4-5 hours, resulting in a thick, durable coat. The fresh finish already makes the space feel clean and serene, with an almost infinity pool-like view of the lake.
Next Steps: Furniture and Finishing Touches
Now, we await the drying of the paint and the arrival of new furniture.
We plan to style the space with terracotta planters and other Mediterranean-inspired decor, completing our backyard transformation.
Stay tuned for updates on our furniture choices and final touches!
Check out these before-after "Progress" pictures.
To be continued!
Love,
BurJu


